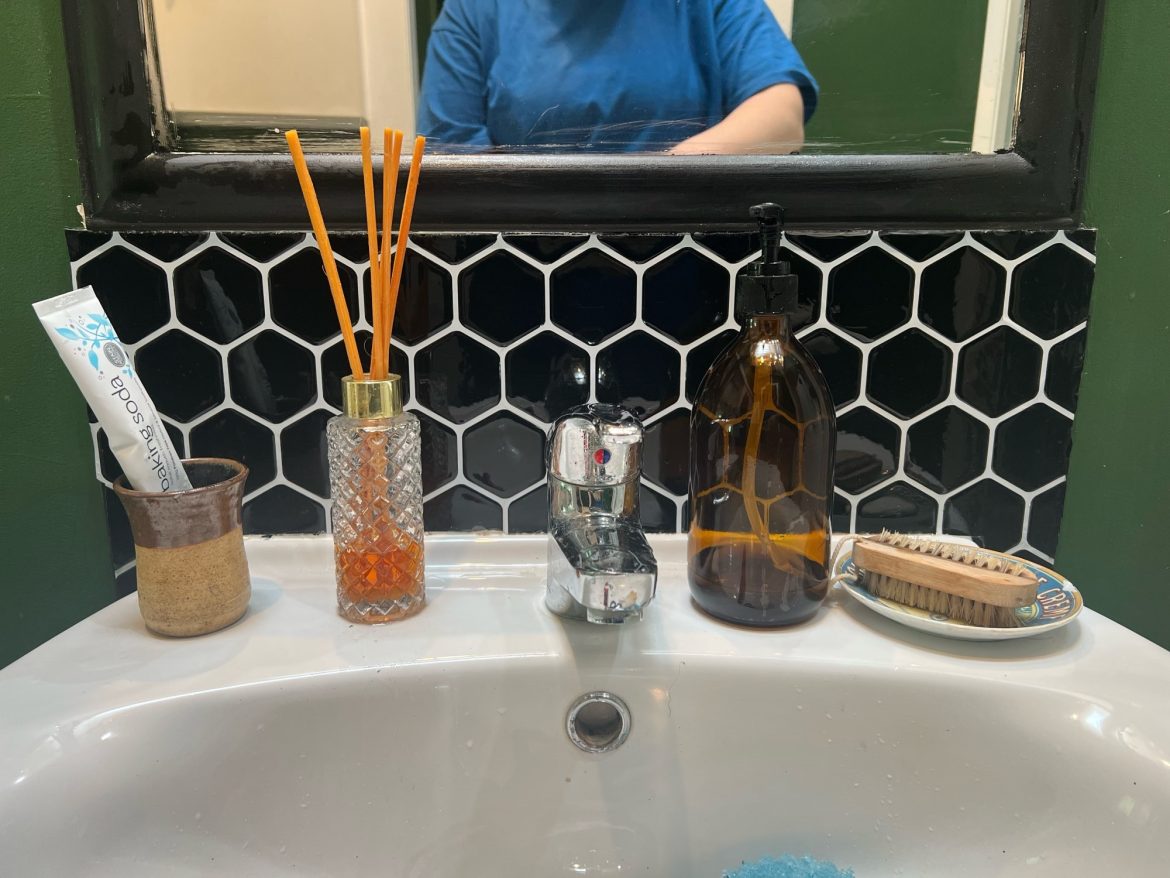
It’s one of the easiest (and most inexpensive) ways to create a stunning backsplash in your kitchen, and it’s not as hard as you might think! With just three products, you can turn any bland tile surface into an eye-catching, three-dimensional mosaic that’s sure to wow all of your dinner party guests! Our tutorial will show you how to create peel and stick 3d backsplash in just minutes!
Use special vinyl peel and stick tile sheets
Peel and stick vinyl tiles come in sheets of varying shapes, sizes, colors, and patterns. They can be used for everything from adding a backsplash or tiling the floor of your bathroom. With this kind of project, it’s best to buy at least 2-3 packages so you have enough peel and stick vinyl tile sheets for what you want to do. Not sure how many sheets you need? Take measurements of the surface area where the peel and stick vinyl tiles will be going.
Prepare the wall in advance
- Wash the wall surface with soap and water, if it has any grease or dirt on it.
- Use a dry cloth to make sure the wall is completely dry before starting this project.
- Use masking tape to cover any areas of your wall you want to protect from getting peeling tiles adhesive on them or covered in grout later on (you may also paint over these areas).
Get professional help if needed
Many people want to create a backsplash for their kitchen, but are unsure how to do so. Luckily, peel-and-stick vinyl tiles are a great way to create an inexpensive and unique look.
Peel-and-stick tiles are self adhesive, meaning that they stick directly onto the surface without the need for grouting or glues of any kind. They come with PU glue on top and backed with strong adhesive.
Use a level board
When you are tiling with peel and stick tiles, it is important to use a level board. This will ensure that the edges of your tiles line up properly. To use this tool, put it on the surface you are tiling, then lay the edge of one tile against the board’s edge. If there is any gap between the edge of your tile and the level board, make adjustments until they are flush against each other.
Measure from corner to corner across each wall
Measure from one corner of the kitchen to the other, then measure from that same corner of the kitchen down each wall. This will give you an idea of how many tiles you’ll need for your backsplash.
Mark spots where you will apply the sheets
- First, measure the area where you want to make your backsplash. It’s best if it is at least a few inches away from any walls or cabinets so that you have enough space on either side of the tile sheets.
- Next, peel back the adhesive backing on one sheet at a time and place it against the wall in the spot you’ve measured out for it. Press down firmly on all four corners of your peel-and-stick tiles until they stick in place.
Cut out your design using scissors, leaving about an extra inch for overlap
Peel and stick vinyl tiles are self-adhesive, with PU glue on top and backed with strong adhesive, people also call them self-adhesive wall tiles or mosaic tile stickers. They are the easiest, fastest, and most affordable way to tile a surface or create a quick mosaic backsplash. To start, measure out how much surface space you want your backsplash to cover.
Start peeling off the backing of your first sheet
Lay the sheet of peel-and-stick tiles on your surface. Starting from one corner, peel off the backing from each tile. Be sure not to touch the adhesive side of any tile until you are ready for it. Start at one corner, peel off the backing from each tile as you work your way along in a straight line.

